

Key takeaways
- Usually suitable: unfinished wood, plywood made with known adhesives, cork, cardboard, paper, leather, slate, and some dark opaque acrylic.
- Often engravable but not normally cuttable: glass, ceramic tile, coated metal, anodized aluminum, painted surfaces, and stainless steel with marking spray or a suitable coating.
- Requires caution: resinous wood, unknown plywood, vinyl, foam, rubber, and composite sheets. Their adhesives or additives may create hazardous fumes.
- Do not laser: PVC, vinyl, unknown plastics, polycarbonate, ABS, fluorinated materials, or anything that releases chlorine or similarly hazardous decomposition products.
The best diode laser engravers in 2026 are the xTool S1 for a safer, more polished enclosed setup, the Creality Falcon2 Pro for larger enclosed projects, and the xTool D1 Pro or Atomstack A10 Pro when low cost and an open-frame format matter more than convenience.
Our top picks


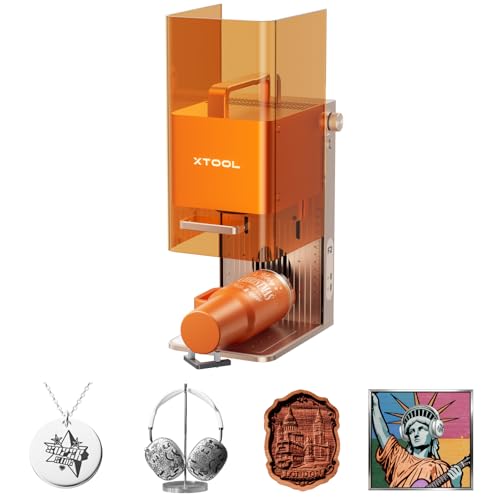

As an Amazon Associate we earn from qualifying purchases at no extra cost to you. Ratings are shown as listed on Amazon.
Quick picks by project and workspace
| Situation | Best fit | Why it fits | Typical market range |
|---|---|---|---|
| Small signs, labels, and occasional craft work | xTool D1 Pro, 10W or 20W | Large enough for common projects, strong software support, and a relatively accessible entry price | $500–$900, depending on enclosure and accessories |
| Detailed work with children or pets nearby | xTool S1, 10W or 20W | Enclosed design, lid interlock, camera-assisted positioning, and optional air assist | $900–$1,500 |
| Frequent larger signs and batch production | Creality Falcon2 Pro, 22W or 40W | Enclosed working area, stronger cutting capability, and a larger footprint than compact machines | $1,000–$2,000 |
| Lowest-cost route to a powerful open-frame machine | Atomstack A10 Pro or comparable 10W–20W model | Good engraving area and power for the money, but more responsibility for enclosure and ventilation | $300–$800 before safety accessories |
Prices are broad market ranges for the machine and commonly bundled accessories, not fixed quotations. Enclosures, air pumps, honeycomb beds, and ventilation can substantially change the final cost.
What matters more than the headline wattage
Engraving area
A larger work area is useful only if you have a flat, stable place to use it. Many desktop diode engravers provide roughly 400 × 400 mm of working space, while compact enclosed machines are often nearer 300 × 300 mm. That difference determines whether a single-pass 12-inch sign will fit.
For aquarium hobby projects, 300 × 300 mm is usually ample for species labels, equipment tags, cabinet plaques, feeding charts, and small decorative panels. Choose about 400 × 400 mm or more for tank stands, club signage, or several labels arranged in one batch. Remember that the machine’s outside dimensions exceed its engraving area, and an open-frame model needs additional clearance around the moving gantry.
Optical power and cutting ability
Diode lasers are commonly sold in 5W, 10W, 20W, 22W, and 40W classes. Optical output is more useful than vague “machine power” figures. A 5W or 10W model can produce exceptionally fine marks on wood, slate, anodized aluminum, and coated materials. A 20W-class machine is a more versatile cutter for thin plywood and some dark opaque acrylic. A 40W model cuts faster or handles thicker stock, but it costs more, generates more smoke, and still does not become a universal material cutter.
Higher power does not automatically produce finer engraving. Detail depends on spot size, motion control, focus, material preparation, speed, and the number of passes. For intricate aquarium artwork, a well-focused 10W or 20W machine may be preferable to an unnecessarily powerful unit.
Material compatibility
- Usually suitable: unfinished wood, plywood made with known adhesives, cork, cardboard, paper, leather, slate, and some dark opaque acrylic.
- Often engravable but not normally cuttable: glass, ceramic tile, coated metal, anodized aluminum, painted surfaces, and stainless steel with marking spray or a suitable coating.
- Requires caution: resinous wood, unknown plywood, vinyl, foam, rubber, and composite sheets. Their adhesives or additives may create hazardous fumes.
- Do not laser: PVC, vinyl, unknown plastics, polycarbonate, ABS, fluorinated materials, or anything that releases chlorine or similarly hazardous decomposition products.
Clear acrylic is a common disappointment: blue diode wavelengths pass through it rather than depositing enough energy for a clean mark. Dark opaque acrylic is much more cooperative. For transparent aquarium panels, use a non-laser marking method or have the material processed by a specialist rather than assuming a stronger diode will solve the problem.
Head-to-head: enclosed versus open-frame machines
xTool S1
The S1 is the strongest all-round choice when safety, repeatability, and a tidy workflow matter more than the lowest purchase price. Its enclosed format reduces accidental exposure to the beam, and its lid and sensor system make interruptions easier to manage. Depending on configuration, the 10W and 20W versions suit detailed engraving and general craft cutting, while larger accessory options can extend the usable work area.
The trade-offs are cost, weight, and a less flexible approach to unusually large or awkward objects. You still need exhaust ventilation: an enclosure contains light, not smoke or chemical vapors.
Creality Falcon2 Pro
The Falcon2 Pro targets users who want an enclosed machine with more cutting-oriented capability. Versions around 22W and 40W are appropriate for larger signs, repeated plywood work, and thicker compatible stock. Its enclosed body is more reassuring than an open gantry in a shared hobby room, although the machine needs substantial bench space and the stronger versions demand careful material testing.
Choose it over the S1 when larger or faster cutting is central to your work. Choose the S1 when compact organization, software workflow, and fine decorative engraving are higher priorities.
xTool D1 Pro
The D1 Pro remains attractive because its open-frame design provides a generous working area for its cost and makes it easier to position some oversized flat materials. The 10W and 20W versions cover a broad range of hobby engraving. Its weakness is not the laser head but the responsibility transferred to the owner: you need a proper enclosure or controlled laser workspace, beam shielding, ventilation, and a reliable emergency-stop arrangement.
Atomstack A10 Pro and similar open-frame machines
An Atomstack A10 Pro-type machine can be a sensible budget choice for an experienced hobbyist who is comfortable calibrating focus, tuning speed and power, and building a safe workspace. Open-frame machines often offer good value and a working area near 400 × 400 mm. They also tend to require more adjustment, have less integrated positioning assistance, and provide fewer safeguards against an unsuitable room or material.
Decision matrix
| Your priority | Recommended specification | What to avoid |
|---|---|---|
| First machine, occasional use, limited budget | 10W diode, approximately 400 × 400 mm, enclosure added to the budget | A 40W machine whose speed you will rarely use |
| Detailed labels and small artwork | 10W or 20W, rigid frame, fine focus adjustment, air assist | Choosing only by maximum cutting thickness |
| Weekly production or batches | 20W–40W, enclosed design, air assist, replaceable lens protection, reliable alignment | A machine with no practical exhaust path or weak workholding |
| Very limited bench space | Enclosed machine around 300 × 300 mm with a measured footprint and front access | An open-frame unit that needs clearance on every side |
| Unusual or oversized pieces | Open-frame design or pass-through capability, but only in a controlled workspace | Assuming a larger nominal area means the object can be safely positioned |
Worked sizing example
Suppose you want to make six 90 × 35 mm aquarium labels with a 10 mm gap between labels. Across the short dimension, three labels require 3 × 90 + 2 × 10 = 290 mm. Two rows require 2 × 35 + 10 = 80 mm. A 300 × 300 mm machine can technically fit the layout, but leaves almost no margin for framing, clamps, or a misaligned edge. A 400 × 400 mm machine gives you 55 mm of spare width on each side if the layout is centered, making batch work much less stressful.
This is why nominal bed size should be matched to your actual layout rather than treated as a simple “bigger is better” specification.
Setup and ownership realities
- Build a safe workspace first. Use a nonflammable base, shield the beam from every viewing angle, keep a suitable fire extinguisher nearby, and never leave an operating laser unattended.
- Plan exhaust before the first burn. Route fumes outdoors where permitted, avoid recirculating smoke into the room, and do not share an exhaust path with a gas appliance.
- Square and focus the machine. A frame that is slightly out of square produces distorted circles and inconsistent dimensions. Use the manufacturer’s focus gauge or procedure before testing material.
- Test a small grid. Vary speed and power on scrap from the same sheet. Material thickness, color, resin content, and surface finish can change the result substantially.
- Use air assist for cutting. It clears smoke from the cut, improves edge quality, and reduces—but does not eliminate—the chance of a flare-up.
- Clean and inspect regularly. Remove residue from the lens window, rails, and honeycomb bed. Check belts, screws, wiring, and air-assist tubing before extended jobs.
The parts most likely to need attention are the protective lens or window, air-assist pump, belts, rollers, and exhaust filter if one is used. A dirty lens reduces power at the workpiece and can suffer heat damage. Excess resin buildup on a honeycomb bed can ignite, while loose belts cause doubled edges and inconsistent engraving.
Final recommendation
For most hobbyists, a 10W or 20W enclosed diode engraver is the best balance of detail, capability, and manageable ownership. Pick the xTool S1 when safety integration and a refined workflow justify the premium. Pick the Creality Falcon2 Pro when larger, faster cutting is the priority. Pick an xTool D1 Pro or Atomstack A10 Pro when budget and a generous open work area matter more—but include enclosure, ventilation, and setup time in the real cost. The best diode laser engravers are not defined by wattage alone; they are the ones whose working area, safety arrangements, and material limits match the projects you will actually make.

Write Your Review
No reviews yet. Be the first to share your experience!