

Key takeaways
- To clean a hang-on-back (HOB) filter without losing beneficial bacteria, unplug it.
To clean a hang-on-back (HOB) filter without losing beneficial bacteria, unplug it, rinse the sponge or biological media in a bucket of old tank water instead of tap water, and never replace every piece of media at once. The impeller and intake tube can be scrubbed more aggressively, since the colony lives mostly on the sponge, ceramic and similar media.
This guide walks through a full cleaning routine for 2026 keepers, from preparing the bucket to restarting the filter. It is written for owners of freshwater tanks with a standard HOB unit, and for anyone who has seen the flow drop, the motor rattle or the water turn cloudy after a rough clean. Always follow your own filter manual for the specific parts of your model.
Why Gentle Cleaning Matters
The helpful bacteria that convert ammonia and nitrite live on surfaces inside the filter, especially sponge, bio-media and the inside of tubes. Tap water often contains chlorine or chloramine, which can harm these colonies. Scrubbing media until it looks new also removes the colony. The goal is to remove debris, not sterilize the filter.
A dirty filter does not clean well, though. Clogged sponge restricts flow and reduces oxygen exchange, and waste held inside can break down and feed algae. A balanced routine keeps flow healthy while preserving the bacterial base.
Before You Start Checklist
- Unplug the filter and the heater before you touch the unit
- Fill a clean bucket with water taken from the tank during a normal water change
- Gather a soft brush, a small impeller brush and a towel
- Check that you have spare filter cartridges or sponge only if you plan to replace any
- Choose a time when you are not about to add new fish or medication
- Do not clean the filter on the same day as a big water change
- Keep a bowl handy for small parts so nothing falls behind the stand
Step-by-Step Cleaning
1. Remove the filter and drain it
Turn off the power, lift the unit off the tank and let the water drain back into the tank. Take the lid and cartridge or sponge out carefully and place them in the bucket of old tank water. Wipe any splashes before they reach the plug.
2. Rinse the media, not scrub it
Squeeze sponges in the bucket until the water stops coming out brown. Swish ceramic rings or bio-media gently. If you use a disposable cartridge, rinse it lightly or, if it is falling apart, replace only part of it so some colonized surface remains. Avoid soap, bleach and hot water.
Work quickly but calmly. Keep the media in the bucket rather than leaving it on a towel, because exposure to air for long periods can stress the colony. If a sponge is torn or crumbling, replace it with a similar one and keep any old piece alongside it for a while so bacteria can spread to the new surface.
3. Clean the impeller, housing and intake
Pull the impeller out and wipe the shaft and the well with a small brush. Dirt here is the usual cause of noise and weak flow. Clean the intake tube with a long, narrow brush and rinse the housing in old tank water or plain tap water for the plastic parts, keeping tap water away from the media.
4. Reassemble and restart
Put everything back in the original order and re-seat the impeller fully. Refill the reservoir with tank water so the pump primes, then plug the unit in and listen. A short rattle should clear within a minute. If it does not, unplug it and check the seating.
What to Clean and How Often
| Part | How to clean | Typical frequency |
|---|---|---|
| Sponge or foam | Squeeze in old tank water | Every few weeks, or when flow drops |
| Biological media | Swish gently in tank water | Rarely; only when clogged |
| Disposable cartridge | Light rinse or partial swap | As the manual suggests |
| Impeller and well | Brush and wipe | Every month or two |
| Intake tube | Brush with a narrow tool | Every couple of months |
Signs It Is Time to Clean
You do not need a fixed date. Watch for a weaker waterfall at the outlet, water level creeping up in the filter box, a new rattling or buzzing sound, or a thick brown layer on the sponge. Any of these tells you the media is clogged or the impeller is dirty. Cleaning at the first sign is easier on the bacteria than waiting until the filter nearly stops.
A heavily stocked tank or one with messy eaters will clog faster than a lightly stocked planted tank. Adjust your routine to what you see, and note the dates so you can spot the pattern.
Different Filter Designs, Different Habits
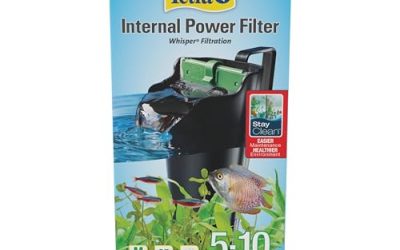
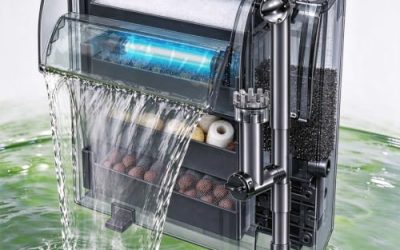
Cartridge-style units use a single replaceable pad, basket-style units let you stack your own sponge, ceramic rings and carbon, and some models combine both. With a cartridge, partial replacement is the safest route. With a basket, you can rinse one layer at a time and keep the others intact, which spreads the risk. Always lay out the media in the same order so water flows the way the maker intended.
Chemical media such as carbon loses its effect over time and is often optional once the tank is established. If you remove it, replace it with biological media so you are not shrinking the surface area for bacteria. Check the manual before swapping layers.
Timing Around Other Tank Work
Avoid stacking tasks. If you plan a large water change, vacuum the substrate or add medication, space the filter clean a few days apart. Medication can be absorbed by media, and a big water change plus a filter clean at once removes both bacteria and the buffer that protects fish. Stagger the work and monitor ammonia and nitrite readings, especially in new or small tanks.
Troubleshooting After a Clean
If the tank turns cloudy, you may have disturbed more debris than expected or removed too much media. Feed lightly for a few days and watch ammonia and nitrite readings. If you see a rise, perform a partial water change and avoid cleaning anything else until readings settle.
If the filter hums or rattles, check that the impeller is fully seated and the cover is aligned. If flow stays weak, look for a blocked intake slot or a worn impeller. Replacement impellers are inexpensive and easy to swap, but check the model name on your manual first.
If your filter shows cracks, frayed cords or water where it should not be, stop using it and contact the manufacturer or a qualified person. Do not run damaged electrical equipment near water.
Finally, treat the first day after cleaning as a quiet one. Skip extra feeding, avoid adding new fish and check the tank again in the evening. A stable restart is the best sign that your routine preserved the bacteria.
Common Mistakes
- Rinsing sponge under the tap and killing the bacteria colony
- Replacing all media at once with new cartridges
- Cleaning the filter and doing a huge water change in the same session
- Forgetting to unplug the unit before opening it
- Ignoring the impeller until it stops turning
- Using soap or bleach on filter parts
Related guides
- Canister Filter For 55 Gallon Freshwater Tank
- Programmable App Controlled Aquarium Lights
- Beneficial Bacteria Starters For Aquariums
Frequently Asked Questions
How often should I clean a hang-on-back filter?
Most keepers rinse the sponge every few weeks and the impeller every month or two. Let flow and noise guide you more than the calendar, and stretch the interval if the tank stays clear.
Can I use tap water to rinse the media?
It is safer to use water from the tank. If you must use tap water, use dechlorinated water and keep the rinse brief. Never use hot water or soap.
Should I replace the cartridge every month?
Not necessarily. Many keepers rinse and reuse cartridges, or swap in sponge that lasts much longer. If you replace a cartridge, keep some old media in the filter so bacteria can colonize the new one.
Why does my filter get noisy after cleaning?
Usually the impeller is not fully seated, there is air trapped in the housing, or the water level in the tank is too low. Reseat the parts, refill the reservoir and make sure the intake is submerged.
More from Amazon
Programs that pair well with the guide above. Offers and eligibility are set by Amazon and may change.
Set up recurring deliveries of everyday items on eligible products. Terms and savings are set by Amazon.
Explore Subscribe & SaveFree shipping on eligible items, Prime Video and more. Eligible new members can start with a free trial.
Start a Prime free trialAudiobooks and podcasts to listen to on the go. Eligible new members can start with a free trial.
Try Audible freeRead from a large library of eBooks and audiobooks on any device. Check Amazon for current plans.
Explore Kindle UnlimitedAs an Amazon Associate we earn from qualifying purchases.
Write Your Review
No reviews yet. Be the first to share your experience!