

Key takeaways
- A raised tile face or beveled perimeter that catches light.
- Subtle variation between tiles rather than one perfectly uniform color.
- Recessed or shadowed grout lines instead of lines printed only on the surface.
- A satin sheen that resembles glazed ceramic rather than high-gloss plastic.
The best subway tile peel and stick backsplash for most kitchens is a rigid PVC or PET-composite sheet with a pressure-sensitive adhesive, a lightly raised tile face, and grout lines printed or molded at roughly 1/8 inch; it offers a more convincing finish and better moisture tolerance than thin foam sheets without the permanence of ceramic tile.
Our top picks
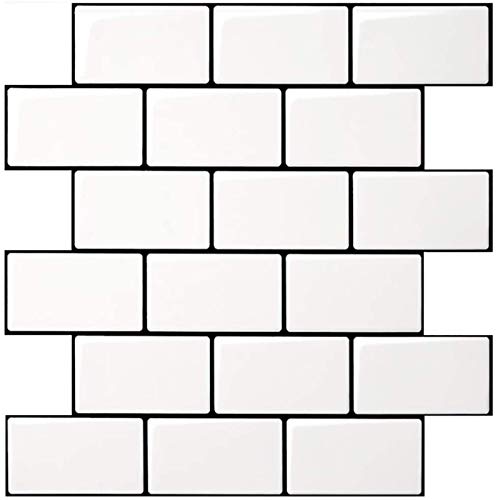


As an Amazon Associate we earn from qualifying purchases at no extra cost to you. Ratings are shown as listed on Amazon.
Best subway tile peel and stick backsplash by situation
| Kitchen situation | Best choice | Why it fits | Trade-off |
|---|---|---|---|
| Rental or temporary refresh | Thin PVC sheet, removable adhesive | Lightweight, easier to cut, and less likely to damage a sound painted wall | Usually less realistic texture and lower heat tolerance |
| Busy family kitchen | Rigid PVC or PET-composite sheet | Better resistance to splashes, scrubbing, and edge lifting | Removal requires more patience and heat |
| Most realistic appearance | Embossed rigid sheet with separate-looking grout lines | Shadows and surface variation disguise the sheet format | Costs more and needs more accurate installation |
| Behind a sink or aquarium work area | Water-resistant sheet with sealed perimeter | Handles repeated droplets when seams and edges are protected | It is not waterproof unless the installation is properly sealed |
| Directly behind a gas or electric cooktop | Heat-rated metal or glass backsplash instead | Offers a safer buffer from high radiant heat and open flames | Less convenient to cut and remove |
What separates a good sheet from a convincing one
Adhesive strength
Adhesive is the first specification to examine because a beautiful tile pattern is useless if corners curl after a few weeks. Look for a full-coverage pressure-sensitive adhesive rather than small dots or widely spaced strips. Full adhesive contact distributes load across the sheet and reduces the chance that steam or cleaning water will work underneath.
The wall matters as much as the product. Peel-and-stick sheets adhere best to smooth, clean, dry, painted drywall, sealed plaster, laminate, and properly prepared tile. Dust, cooking grease, silicone residue, chalky paint, and textured walls are common causes of failure. A glossy wall may need light abrasion; a freshly painted wall should usually cure according to the paint manufacturer’s guidance before installation.
Strong adhesive is not automatically ideal for a rental. Permanent or aggressive adhesive can pull paint, paper facing, or weak drywall compound away during removal. If removability is important, choose a product specifically described as removable and test one hidden corner before covering the whole wall.
Tile texture and grout-line realism
Flat printing is the least expensive finish, but it can look like wallpaper when viewed from the side. A better subway tile sheet has one or more of these features:
- A raised tile face or beveled perimeter that catches light.
- Subtle variation between tiles rather than one perfectly uniform color.
- Recessed or shadowed grout lines instead of lines printed only on the surface.
- A satin sheen that resembles glazed ceramic rather than high-gloss plastic.
Depth should remain restrained. Very deep faux grout can collect grease and make seams obvious. For a standard subway appearance, a tile face around 2.5 to 3 inches high and 6 to 12 inches wide looks more natural than oversized panels with a few exaggerated rectangles. Check the pattern repeat before buying: a repeat shorter than the width of your wall can make the imitation visible.
Heat and moisture resistance: where peel-and-stick belongs
Most peel-and-stick subway products are suitable for normal backsplash conditions: sink splashes, wiping, humidity, and occasional steam. “Water-resistant” generally means the face tolerates moisture; it does not mean water can sit behind the sheet or enter an unsealed joint. Apply a compatible kitchen-and-bath sealant along exposed ends, inside corners, and the countertop joint when the manufacturer permits it.
Heat is more complicated. A wall behind a sink or food-preparation counter is a relatively easy location. The area directly behind a cooktop experiences stronger radiant heat, grease, and rapid temperature changes. Many plastic or foam sheets are not appropriate there, especially beside an open gas flame. Use the product’s stated maximum temperature and required clearance, not a generic claim that it is “heat resistant.” When the specification is unclear, choose tempered glass, stainless steel, ceramic, or another purpose-built noncombustible backsplash for the cooktop zone.
For an aquarium hobbyist, the same rule applies around a fish-room sink or water-change station: repeated splashes are manageable, but protect every cut edge around plumbing, countertops, and wall penetrations. Standing water at an unsealed seam is more damaging than a brief splash.
Coverage: calculate the sheets before you order
Measure the wall in inches, multiply width by height, and divide by 144 to obtain square feet. Then add 10% for trimming and pattern matching. Add 15% if the wall has several outlets, corners, pipes, or a diagonal termination.
| Wall size | Area | With 10% waste | Number of 12-by-12-inch sheets | Number of 10-by-10-inch sheets |
|---|---|---|---|---|
| 24 by 18 inches | 3.0 sq. ft. | 3.3 sq. ft. | 4 | 5 |
| 48 by 18 inches | 6.0 sq. ft. | 6.6 sq. ft. | 7 | 10 |
| 72 by 18 inches | 9.0 sq. ft. | 9.9 sq. ft. | 10 | 12 |
| 96 by 20 inches | 13.3 sq. ft. | 14.6 sq. ft. | 15 | 18 |
For example, a 72-inch-wide by 18-inch-high backsplash is 9 square feet. At 10% waste, plan for 9.9 square feet. That means ten nominal 12-by-12-inch sheets, not nine, and twelve 10-by-10-inch sheets. If a package contains multiple sheets, round up to the next complete package. Keeping one spare sheet is useful for future repairs because color and texture can change between production batches.
Installation details that determine whether it lasts
- Dry-fit the layout. Center the pattern or place cut pieces at the least visible ends. Avoid leaving a narrow strip less than half a tile wide beside a cabinet.
- Clean and degloss. Remove grease with a suitable degreaser, rinse if required, and let the surface dry completely. Do not install over loose paint or peeling wallpaper.
- Mark a level starting line. Countertops are not always level. A slightly uneven first row will make every subsequent grout line look crooked.
- Cut face-up with a sharp blade. Score several times rather than forcing one deep cut. Replace blades when they begin tearing the surface.
- Apply gradually. Expose only a small section of backing at a time and press outward with a firm squeegee or clean block to remove air pockets.
- Roll the edges. Pay special attention to corners, cutouts, and the bottom edge above the counter.
- Seal appropriate joints. Use a compatible sealant only where recommended. Do not seal over dampness or trap water behind a loose sheet.
Removability and ownership realities
Removal is usually easiest when the sheet is warmed gently with a hair dryer and peeled slowly at a low angle. Pulling straight outward can remove paint or tear the sheet into small pieces. A plastic scraper is safer than a metal blade. Expect adhesive residue, particularly after years of heat exposure; a manufacturer-approved adhesive remover and repainting may be necessary.
The parts that wear first are normally exposed corners, the joint above the countertop, areas beside the sink, and surfaces repeatedly scrubbed with abrasive cleaners. Avoid scouring pads, powdered cleanser, acetone, and harsh solvent cleaners unless the product documentation specifically allows them. A soft cloth, diluted dish soap, and prompt drying preserve the finish better.
Do not install over active mold, damp drywall, failing grout, or a leak. A peel-and-stick backsplash conceals problems rather than repairing them. Likewise, do not use it to bridge a large wall crack or a visibly textured surface; movement and poor contact will eventually telegraph through the sheet.
Bottom line
Choose a rigid, embossed PVC or PET-composite subway sheet with full adhesive coverage, a documented moisture rating, and grout lines that create real shadow rather than only printed contrast. Buy thin removable PVC when temporary installation matters, upgrade to a more substantial sheet for a busy sink wall, and use a noncombustible material at a high-heat cooktop unless the peel-and-stick product provides clear, suitable temperature instructions. The extra ten to fifteen percent for waste, careful surface preparation, and sealed vulnerable edges will matter more than choosing the cheapest pattern.

Write Your Review
No reviews yet. Be the first to share your experience!